Should I Add Tensioning To A Deer Fence?
Posted by Crittefence Deer Fencing on Aug 7th 2025

Should I Add Tensioning To A Deer Fence?
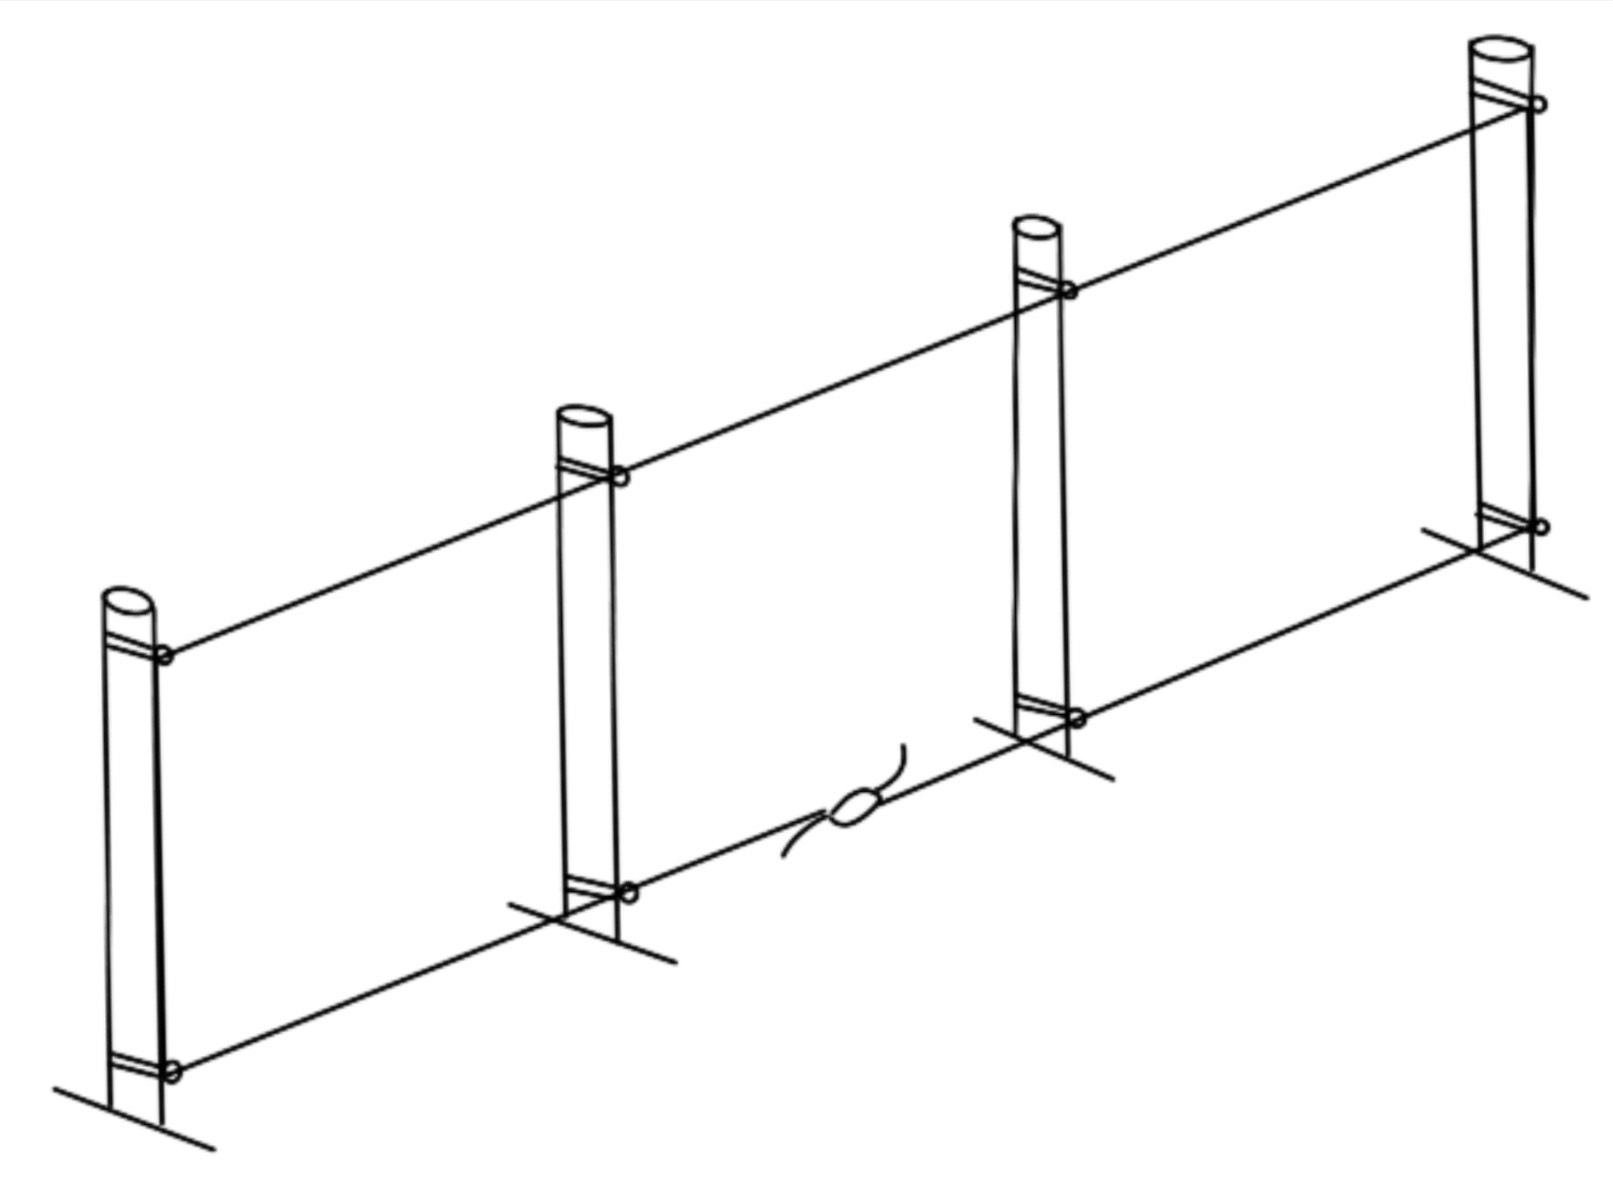
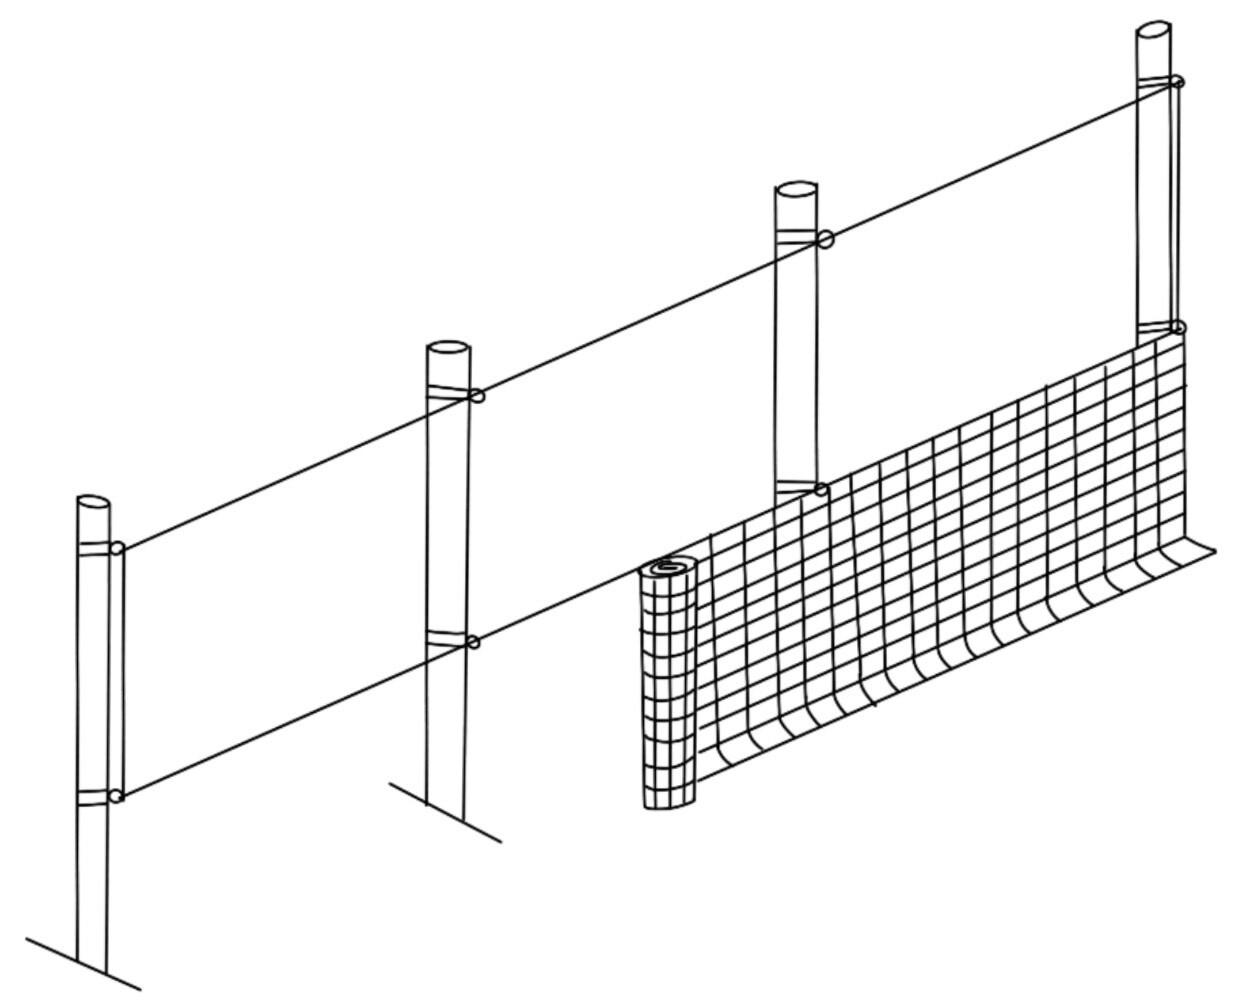
Deer fences come in all different shapes and sizes, so how do you know when to add tension to it? Tensioning with our systems is different than other fence systems because we utilize the looping method. Instead of a straight cable run across the top and bottom of the fence, we run cabling in a rectangular loop between every 3 to 4 posts and secure with a gripple.
Poly Fencing
With poly fencing, the type of the mesh you use, and the length of the fence are the most important factors for determining if tensioning is right for you. When it comes to medium to small gardens (think 165 linear feet or less) tensioning isn’t required. Adding tensioning will never hurt a fence, but it is not necessary for all applications. Some poly fence meshes are heavier than others, when you get to higher tiers of strength tensioning is suggested to help the posts support the mesh.
When trying to decide on adding tensioning to poly fences, use the guide below!
|
Poly Fencing |
||
|
Is my fence over 165ft? |
Yes |
Tension it! |
|
No |
Your choice to add tension but not required. |
|
|
Are there many turns? (over 4) |
Yes |
Tension it! |
|
No |
Your choice to add tension but not required |
|
|
600, 650, 700 Poly Fence Mesh? |
Yes |
Your choice to add tension but not required |
|
800, 1050, 1100, 1400 Poly Fence Mesh? |
Yes |
Not required but recommended! These fence meshes are heavy and could lead to sagging. |
If you answer yes to any of these, tensioning is recommended. While not always required, in certain circumstances like a 100ft square fence utilizing the 1400 poly mesh could benefit greatly from adding a tensioning system.
Poly/Steel Combination Fencing
This type of fence always has questions regarding tensioning. In short, tensioning is recommended for these applications, even for smaller gardens. The reason why is there are two different fence meshes in play here – the poly deer fence and the steel dig or rodent guard. When using two different types of mesh, the easiest way to create a good seal between them is adding the tensioning line. This way the bottom wire in our loop will meet the top of the steel rodent/dig guard, and you can connect them all together with a hogringer.
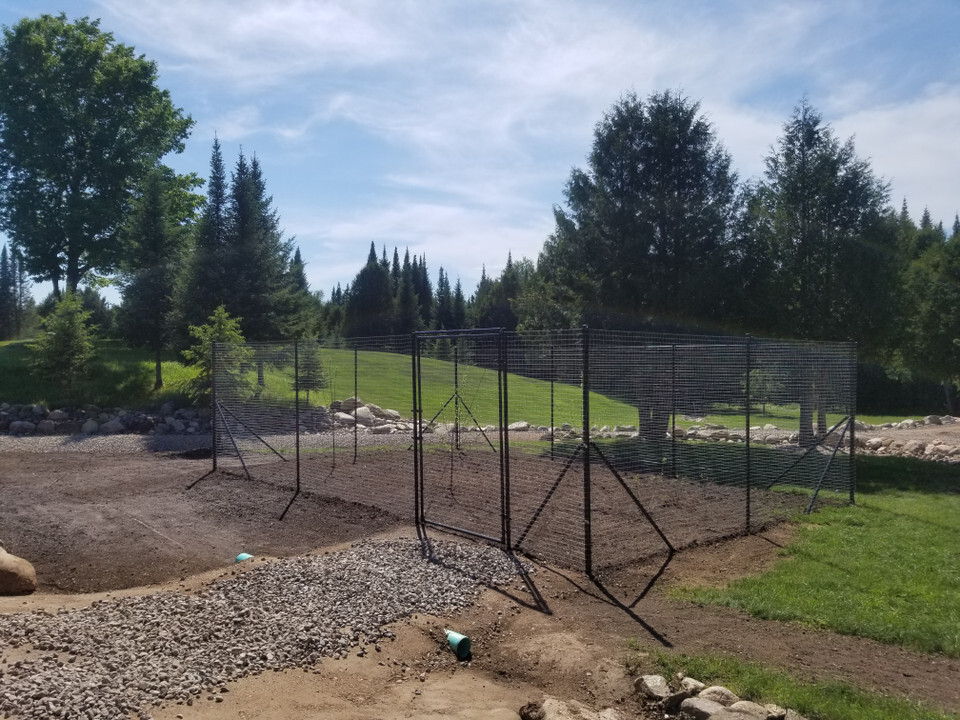
Steel Fencing
This type of fence is heavy and requires a much closer post spacing than a poly fence. With smaller gardens using all steel fencing (think 100ft or less), tensioning isn’t required but can help support the fence. Once you go over 100ft, tensioning is suggested to support the weight of the fence along such a long span.
Tensioning With Critterfence
Since we narrowed down the different situations that could require tensioning, we should dive into what tensioning looks like with our system since it is different from other systems. The items used in our tensioning systems are post cable collars, tension cable, gripples, and ringers. Some applications utilize a torq tensioning tool, which clamps over the gripples and pulls the cable tight through cranking.
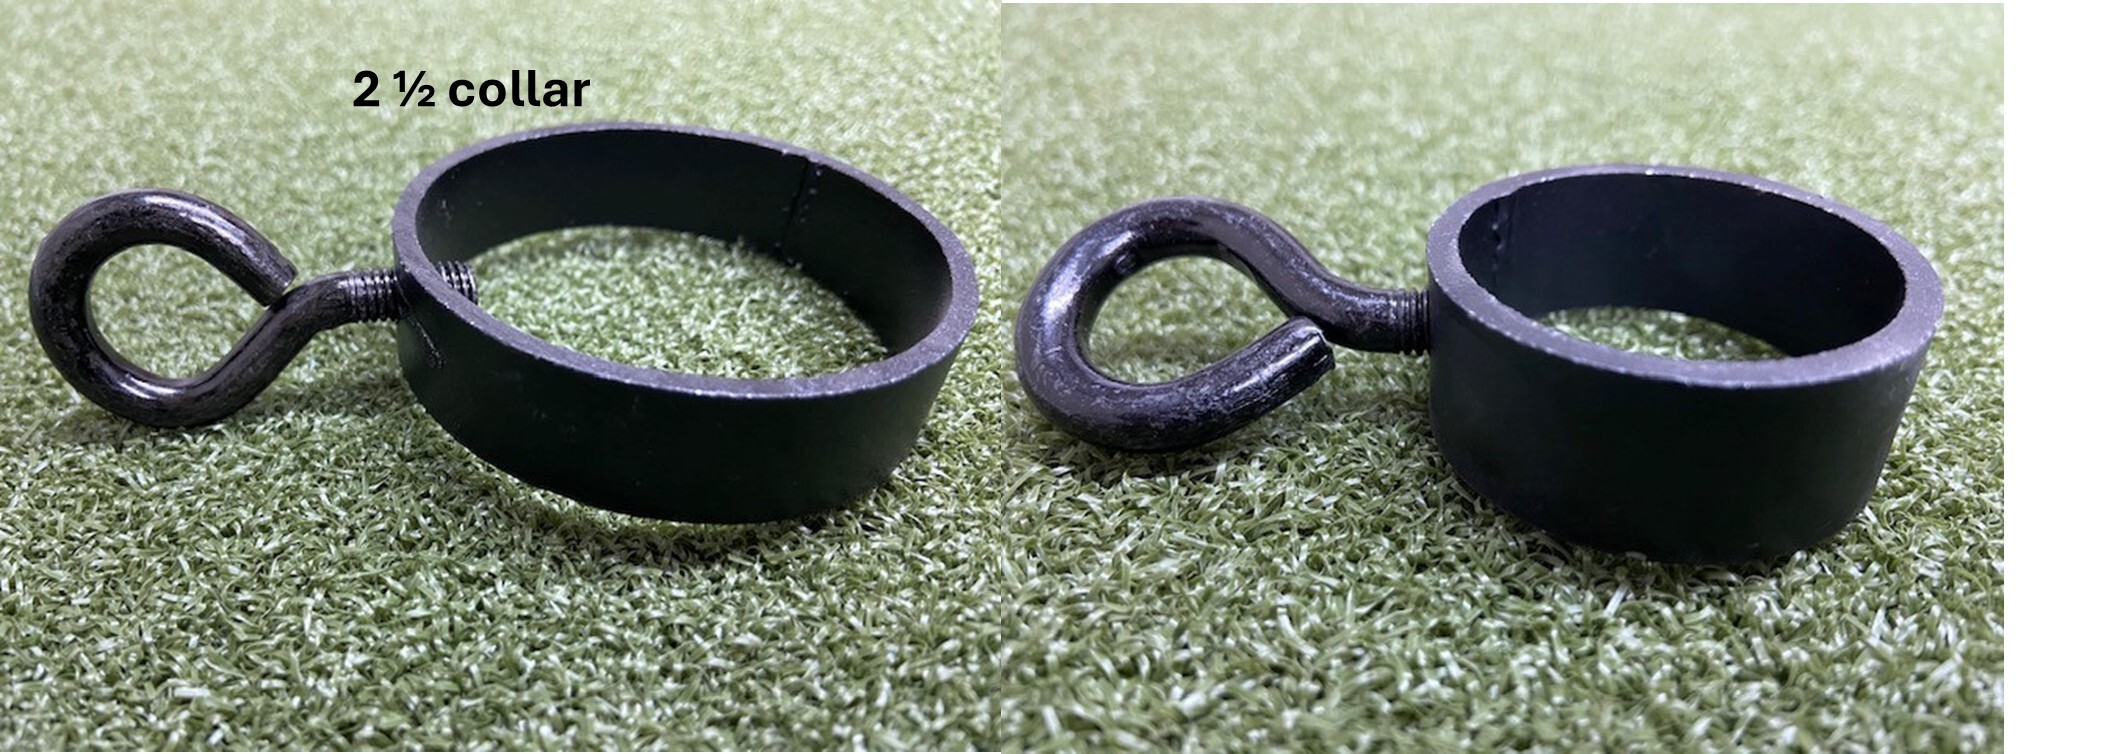
Post Cable Collars
Post cable collars come in two different sizes, 1 5/8” and 2 ½” for each of the posts we use in our systems. When you add tensioning to a fence, you need corner or end posts with bracing to support the turns in the fence against the pull of the tension wire. When adding tensioning to a fence, count the number of 1 5/8” and multiply by two, same with the 2 ½” posts. You will need two collars per post.
Ex: Your fence contains fourteen 1 5/8” line posts, one 5ft wide access gate, and four 2 ½” corner posts. For this you would need:
- twenty-eight 1 5/8” collars for the line posts (14 posts x 2 = 28 collars)
- four 1 5/8” collars for the gate (2 posts x 2 = 4 collars)
- eight 2 ½” collars for the corner posts. (4 posts x 2 = 8 collars)
Your total would be thirty-two 1 5/8” collars and eight 2 ½” collars!
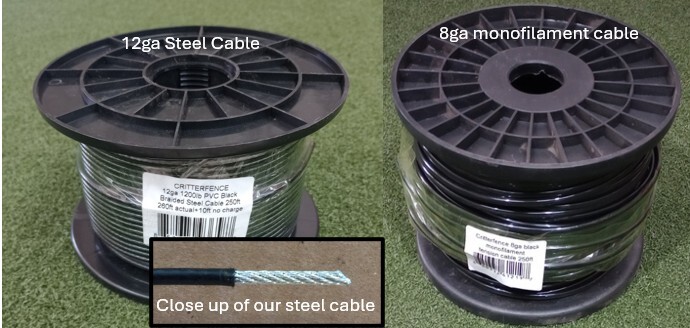
Tension Cable
Our tension cables come in two different varieties, an 8ga monofilament cable and a 12ga steel cable, so how do you know which one to use? If you are installing on our posts or wooden posts in concrete, you will want to use the 12ga steel cable. This will create a rigid line, leading to no movement between the posts. If you are installing on trees, or even using trees and posts, you will want to use the 8ga monofilament cable. This cable is a very thick, strong plastic that will allow some movement of the cable when the trees sway in the wind. This is necessary to avoid line snapping during storms! When trying to figure out how much cable you need, just look at your footage! You should get one 250ft spool for every 100ft of fence.
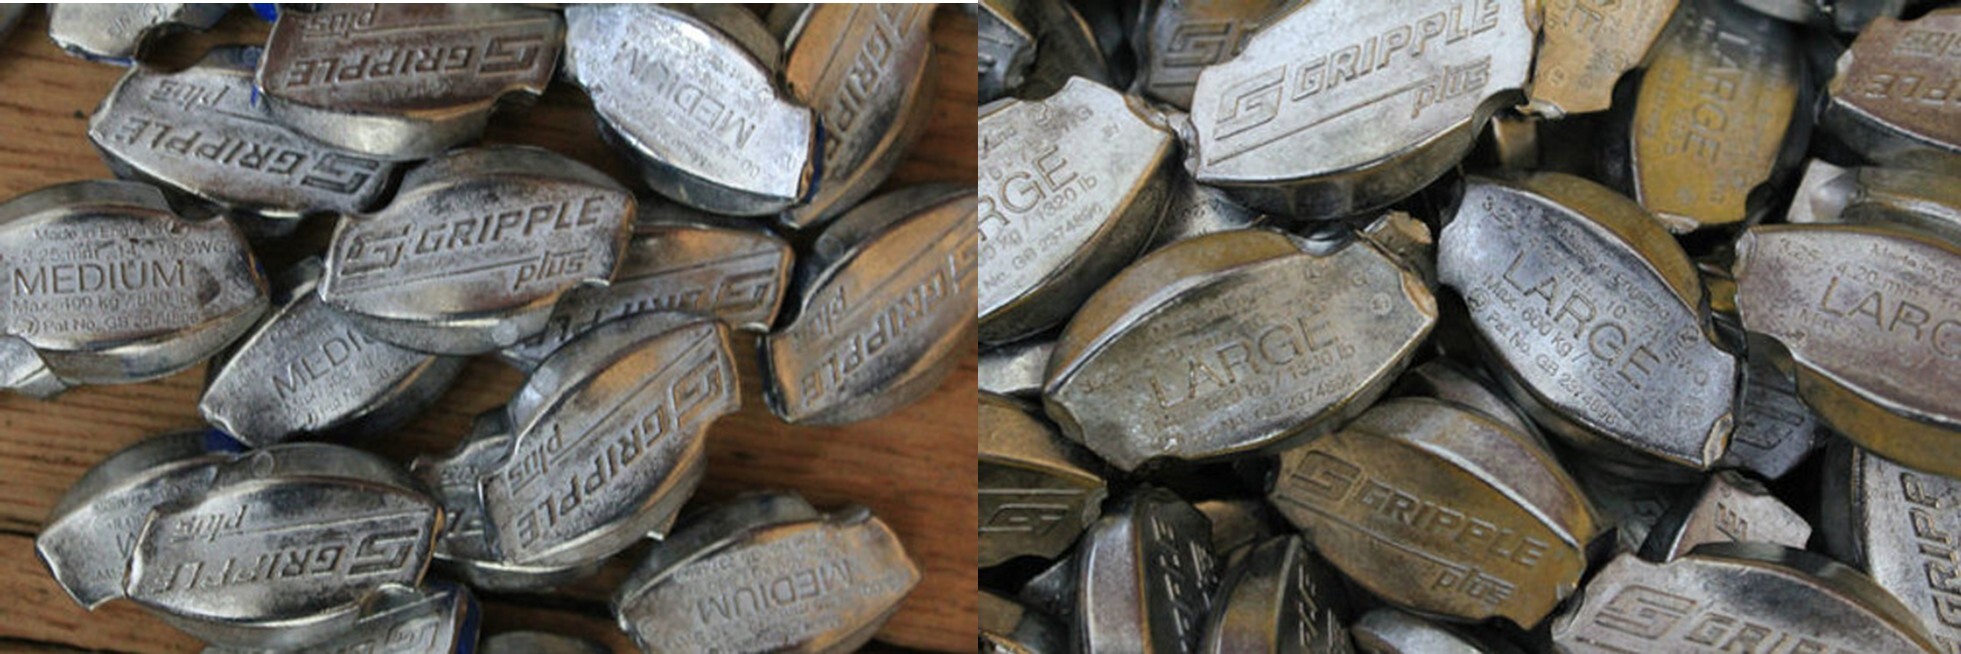
Gripples
Like the tension cable, our gripples come in two different sizes, one for each type of cable. The 12ga steel cable utilizes “Medium gripples” and the 8ga monofilament cable utilizes “Large gripples”. These will connect your ends of cable together within your tension loop by inserting the two loose ends of cable into the top and bottom holes of the gripple and pulling tight either by hand (best to use pliers to pinch and pull), or with the torq tensioning tool. When ordering these, you will want to count your total amount of posts (gates and corners included!) and divide this number by two.
Ex: You have fourteen-line posts, one gate, and four corners. This is 20 posts total, so you would need 10 gripples. If you end up on an odd number, we suggest you round up to the next even number. (if your count is 17, get 18 gripples).
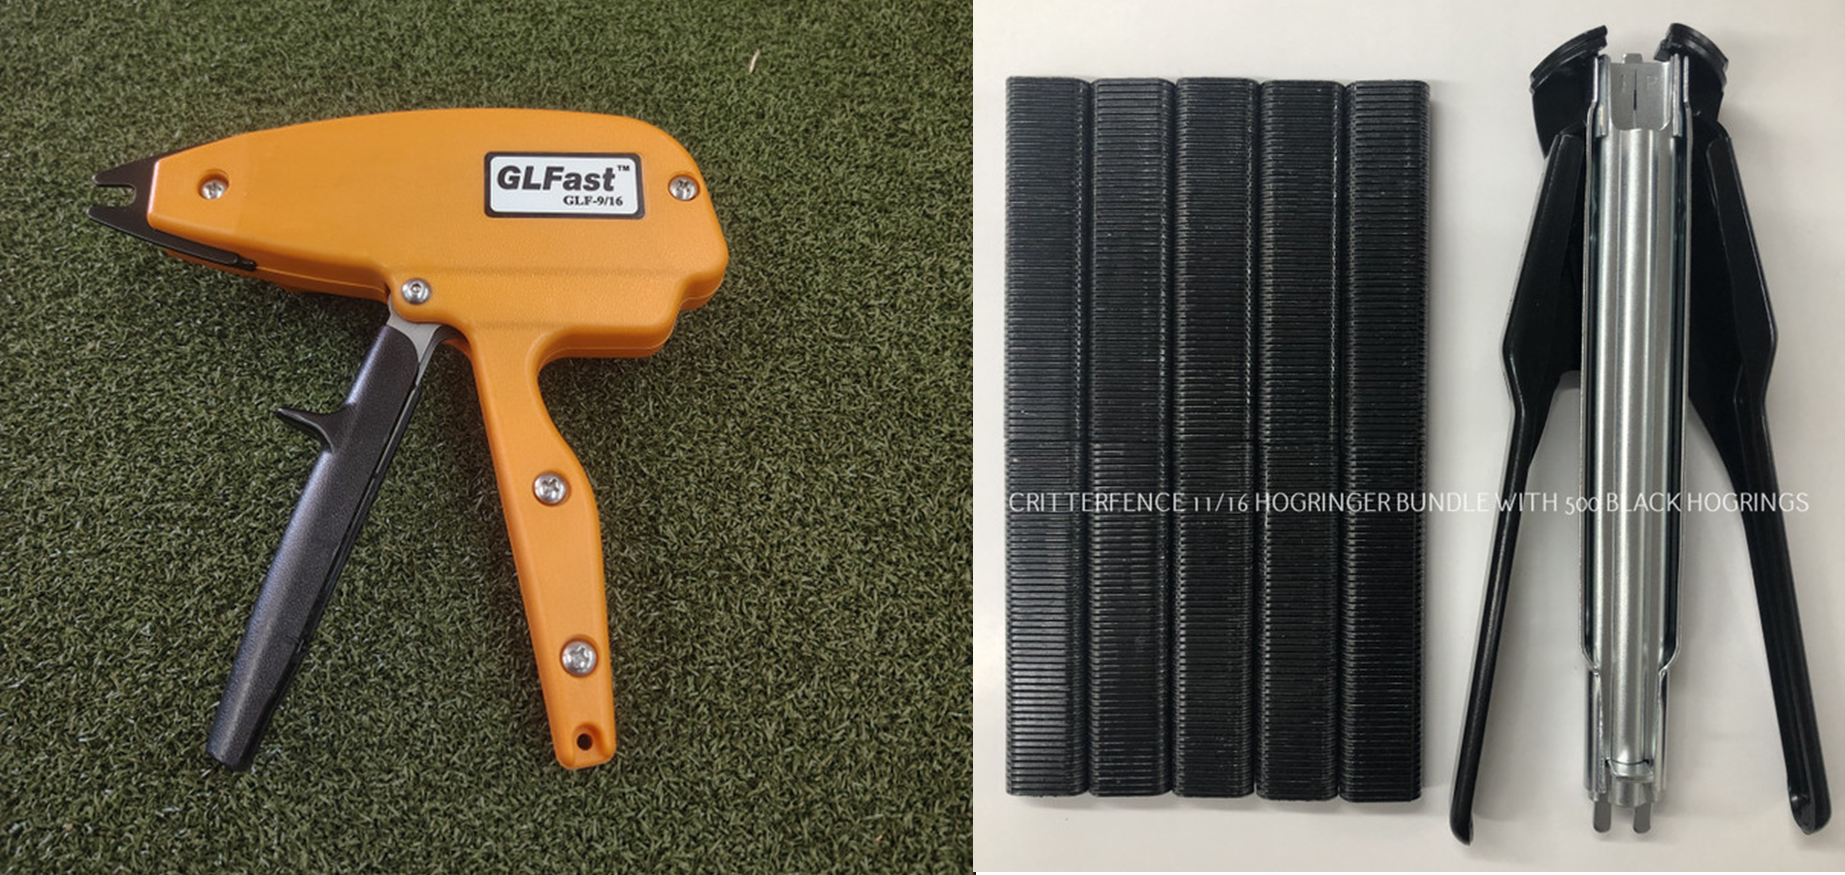
Ringer Tools
Once you have your tension line up, how do you attach the fencing to it? Instead of weaving the cable through the fencing, we use ringer tools! These will crimp small steel rings around the cable and fence mesh, connecting them together. Typically, you place a ring every foot, but you can go in and add more if you believe you need it, it won’t hurt! We have two types of ringer tools available, the GL Fast 9/16 Ringer with a trigger-style mechanism and the 11/16 Ringer with a plier-style mechanism. For runs over 300ft, I would suggest the GL Fast 9/16 Ringer tool for faster installation but either tool will work! When trying to determine how many rings you will need, our golden rule is 1 box of 2500 rings for every 300ft.
Tensioning Overall
In the end, tensioning is ultimately up to you but certain situations could benefit greatly from it! Tensioning is never required for our kits, but will never hurt to add. For more information on tensioning installation, see our instructions here. Tensioning installation begins on page 6: CF-Instructions
If you ever have any questions or wish to get a quote put together with all of the tensioning materials needed for your fence, feel free to reach out at 855-921-7900!